Griddlers Tutorial - Solving Puzzles
Example 1: Solving a Simple Puzzle
(Using SLS - Single Line Solving)
Solving a puzzle is a process of elimination. We work out where colored squares must be, and where they can't be. As we do this, other rows and columns become solvable.
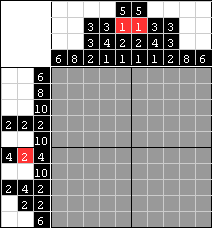 | This is the puzzle we're going to solve. It is a 3 color puzzle. Two colors will make up the picture (black and red) and the third color will be the white background. We will solve the puzzle by using the SLS (Single Line Solving) method, which means - working on one line at a time. |
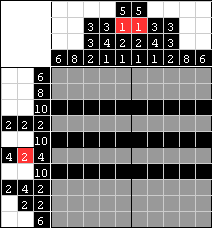 | First, we look for rows or columns that have clues with high numbers. In this puzzle there are 3 rows that have clue 10, meaning - 10 consecutive black blocks. Since the grid is 10 squares wide, these blocks must run all the way across the grid. |
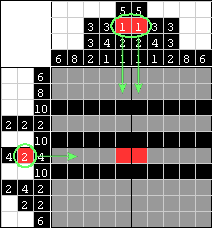 | Next, we look for obvious clue sets, which in this case are the 2 red cells needed horizontally. Notice that there are only 2 columns running down that have red squares in them, therefore the 2 red cells running across must be placed in those 2 columns. |
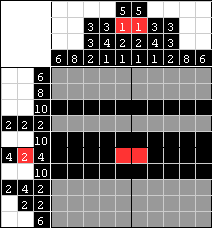 | We can fill in the two black blocks of 4 which go on either side of the block of 2 reds since there are exactly 4 squares either side of it. An alternate method for solving that row would be to look at the clue row, and notice that 4+2+4=10 and fill in the row. |
| Look at the row that has clue 6. The images show that there are five possible locations for a block of 6 blacks. No matter which one of the five possibilities is correct, the 2 squares marked with green X's will be black because they are black in every different case. | |
 | An alternate method for solving such clues is overlapping counting: Count 8 squares across from the left and blacken the 8th one. Then, count 8 squares across from the right and blacken the 8th one. Finally, blacken the squares between those two. |
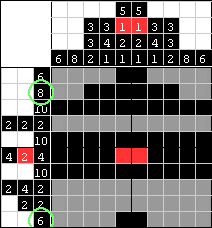 | Using the theory explained above, we can color in 2 black squares of clue 6 in both the top and bottom rows. We can also blacken 6 of the required 8 squares of clue 8 on the second row. |
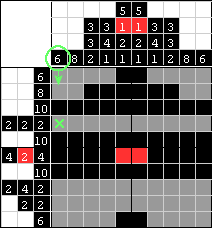 | Let’s look at clue 6 on the first column. For the block to be consecutive, there must be a black square where the green X is. |
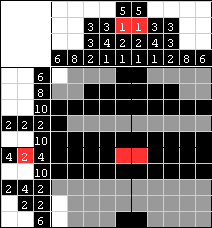 | We now have 5 of the 6 squares required for that clue. This means that there is only 1 more black needed. The top square and the bottom 2 squares must be white because that block of 6 will not reach that far at either end. |
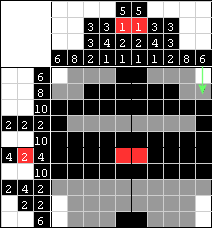 | The last column is identical to the first one. We can repeat the process in that column. |
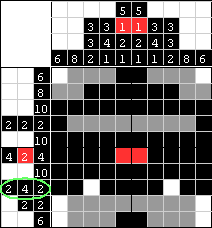 | Look at the row with the clues circled in green. Blocks of the same color must have at least one space between them, so all 10 squares across the grid are accounted for and can be filled in. 2black+1white+4black+1white+2black=10 |
 | This completes the required block of 6 blacks in both the first and last columns, so we can whiten the 2 squares marked with green X's. |
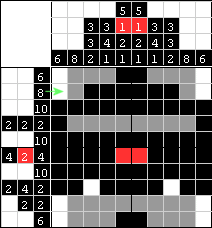 | The second row has 8 squares available that can be filled with a color. Since that row needs a block of 8 black, both the gray squares at either end must be black as well. |
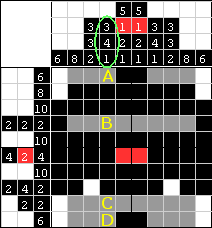 | Let's look at the fourth column. The clues are 3, 4 and 1. Notice that there is already a block of 4 blacks between B and C. Since there is only one clue 4 and there must be at least one space at each end of it, B and C must be white. Below clue 4 there is clue 1. Since D is the only available square, D must be black. Similarly, there needs to be a block of 3 blacks at the top, and since B is white, A must be black. |
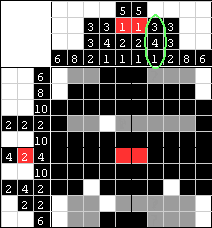 | Notice the identical column circled in green. We can repeat what we did in the previous step. |
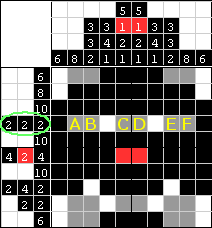 | In this row we need three blocks of 2 blacks. We already have single black squares at either end of the row, and since they need to be 2's, A and F must be black. This leaves only one other place in this row where a block of 2 blacks can go, so C and D must also be black. We now have three blocks of 2 blacks, so B and E must be white. |
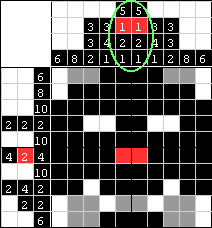 | All the required clues have been filled in both of these columns, so the one gray square left in each must be white. |
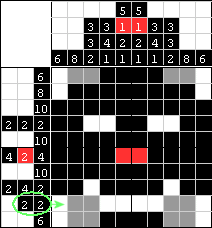 | The clues in this row are 2 and 2. There are only 2 locations available for these blocks. Fill them in with black. |
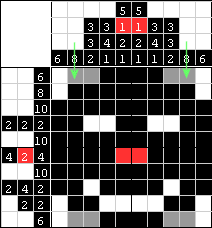 | Both of these columns now have the required 8 blacks, so the gray squares that remain must be white. |
 | This leaves us with 2 gray squares at the top and 2 gray squares at the bottom. Whether we use the side or top clues, all these squares must be black. |
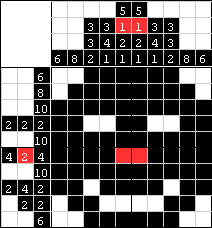 | All the grid is filled in. How do we know that we solved the puzzle correctly? |
 | If a puzzle is correct, all the clues and grid lines will disappear leaving you with an image. Have fun! |

